AlmaLinux provides some "Live" images with various desktop environments. I installed the KDE "spin" and found out that there is a crap load of useless / unwanted packages. Here are my notes to disable them.
You may want to keep sssd and oddjob if your workstation has membership to an Active Directory. You may also want to keep plasma-discover if you want a GUI to search for packages and have software updates notifications.
Softwares that can be a security issue on a workstation (they may listen for connections or allow unwanted remote access):
It's a shame that AlmaLinux and RockyLinux do not provide a "minimal" KDE Live image, or a clear documentation to install a minimal set of packages. Let's hope that KDE gets more attention from Red Hat for the next major release!
If you need to install Zabbix-Agent2 on Ubuntu 16.04, you will find out that there is no available packages in Zabbix repository (unlinke Zabbix-Agent). You can try to use packages for other Linux systems, even RPMs, but you will always end up with library or ABI issues. The only way to make it work is compilation.
wget https://go.dev/dl/go1.19.3.linux-amd64.tar.gz
tar xf go1.19.3.linux-amd64.tar.gz
export PATH=$PATH:/root/go/bin
You should now be able to build Zabbix-Agent 2. I took these options from Zabbix documentation and made some ajustements from what I found in packages in Zabbix repository:
Kdenlive use ffmpeg and MLT. So it's basically MLT syntax to pass arguments to ffmpeg. But what about CBR, VBR, CQP, CRF? What's the magic behind these acronyms ?
CBR: Constant Bit Rate. Predictable bandwith, good for streaming. However, it's up to you to set the correct birate and it depends on the resolution of the video (720p, 1080p..) and its content (things that move fast will require more bandwith). A low value means bad quality while high means unnecessary huge files.
VBR: Variable Bit Rate. Set a nominal and a maximal bitrate settings that the encoder will use. This is similar to CBR except that the output file should be less huge.
CRF (Constant Rate Factor) and CQP (Constant Quantizer Parameter). I admit I do not get the difference between those two, but the idea is the same: you do not set the bitrate, but the quality level you want to achieve.
CBR and VBR are good for streaming because you need a predictable bandwith output. However when you need to locally record a video, you do not really care about the bandwith but more about the quality and the file size, in that case CRF / CQP are more suited.
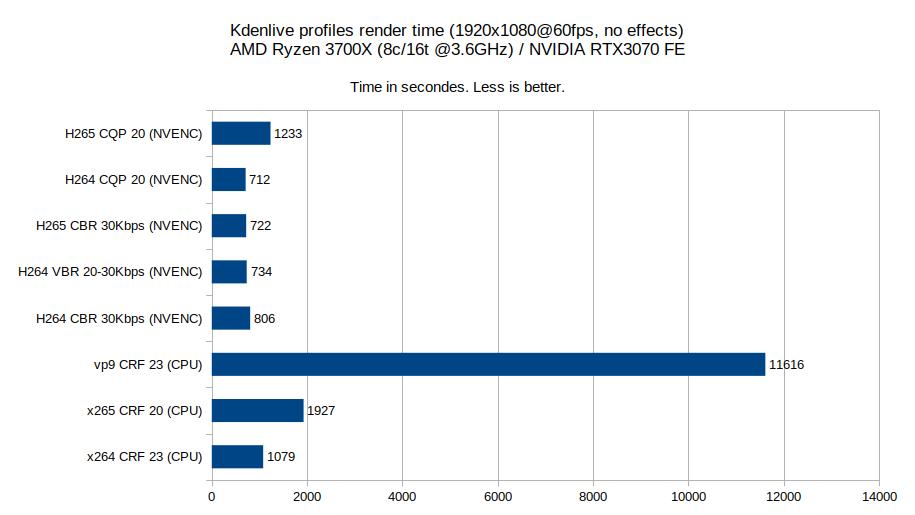
The input file was a 45min gaming session of Star Wars: Knights of the Old Republic, in 1920x1080 60fps + encoded in H264. I did not applied any effects except cutting video/audio.
Computer specifications:
AMD Ryzen 3700X (8c/16t @3,6GHz)
16GB DDR4
Nvidia RTX3070 FE
500GB NVMe SSD
Windows 10 x64
Kdenlive 20.12.13
While VP9 is a totally free fairly good codec, it is incredibly slow (3h13 versus 0h18 for x264). H265 is slower than H264 probably for good reasons although I'm not able to see a difference in output quality. H264 CQP 20 (NVENC) is 34% faster than x264 CRF 23 (CPU). Keep in mind x264 and x265 speed highly depends on the number of CPU cores. If you can get yours hands on a 3900X (12c/24t) or a 3950X (16c/32t) then I suspect they can match or outperform NVENC.
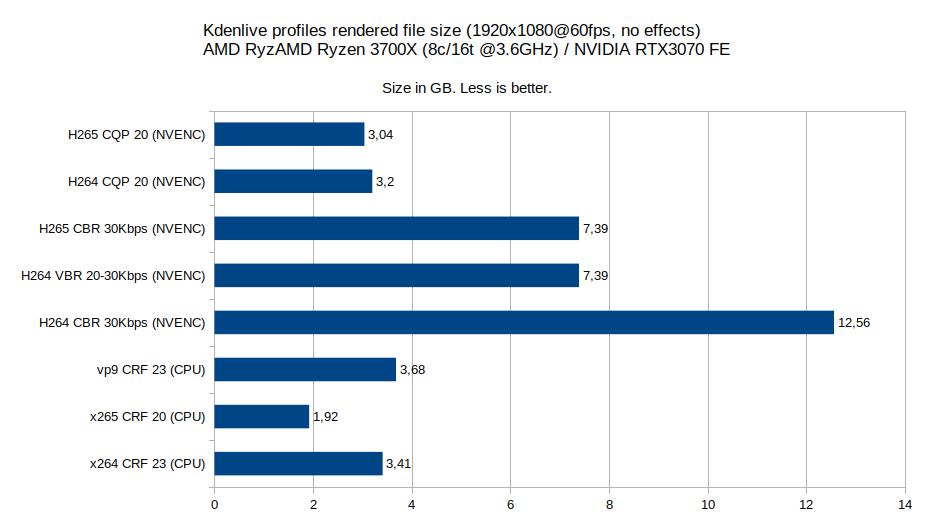
H264 CBR 30Kbps (NVENC) is the worst for file recording, resulting in a 12,56 GB file while you can achieve 3,2 GB using H264 CQP 20 (NVENC). x265 seems to be the most efficient (only 1,92 GB) but it's probably related to the CRF 20 agressive parameter. Of course I can't just fix all parameters to 20 because the output quality will depend on the codec, yeah it's black magic.
Limitations
Before jumping to conclusion, you need to be aware of some limitations of my benchmark:
The input file was encoded in H264, I did not tried anything else. This may explain the bad results for VP9.
x264 and x265 performance scale with the number of CPU cores.
I do not know if NVENC speed and quality depends on the GPU.
NVENC CQP 20 looks fine for me, but it's purely subjective. Another value might change the benchmark.
Kdenlive on Windows can't use NVENC to render video effects and will use the CPU, this is the reason why I did not add any.
Conclusion
I usually stick with H264 CQP 20 (NVENC) which is the fastest with a good quality output (at least to record video games) and a reasonable file size. While Nvidia recommends CQP 15, I can't tell the difference with CQP 20. Also remember that if you upload your video on Youtube, it will be reencoded in AV1 / VP9 with lower quality settings anyway.
Again, you have to understand that there is no "best encoder" for all situations. This is what I think works best for me, but it might be totally different for you.
Kdenlive is a great software but I noticed a major drawback on the Windows version: render time that is really slow. For example, let's take a 45min H264 2560x1440 60fps video file and crop it to 1920x1080 ("Position and Zoom" effect on Kdenlive). Render time is about 1h15 on Kdenlive while it's only 15 minutes on Adobe Premiere Pro, the difference is insane. Why is the later so fast ? Spoiler: GPU rendering.
Let's talk about how rendering works. Kdenlive use ffmpeg and MLT. The Windows version of Kdenlive is built with an embedded minimal ffmpeg that does not support GPU hardware acceleration, which is sad. Fortunately, it is possible to download the full version of ffmpeg and install it on Kdenlive, here is how to proceed.
Run the kdenlive installer which is in fact a self-extracting archive. Extract the contents in a location, for example C:\Program Files\Kdenlive.
Extract ffmpeg-release-full-shared.7z to a temporary location, for example C:\Users\utux\Downloads.
Copy C:\Users\utux\Downloads\ffmpeg\bin\* to C:\Program Files\Kdenlive\bin\
Copy C:\Users\utux\Downloads\ffmpeg\presets\* to C:\Program Files\Kdenlive\share\ffmpeg\
Configuration
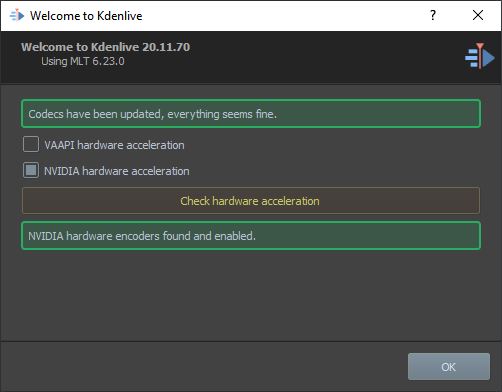
Start or restart Kdenlive then click Configuration > Run Config Wizzard. Check "Nvidia hardware acceleration" and make sure it is properly detected.
The following render profiles show be available now:
NVENC H264 CBR
NVENC H264 VBR
NVENC H265 CBR
VAAPI Intel H264
VAAPI AMD H264
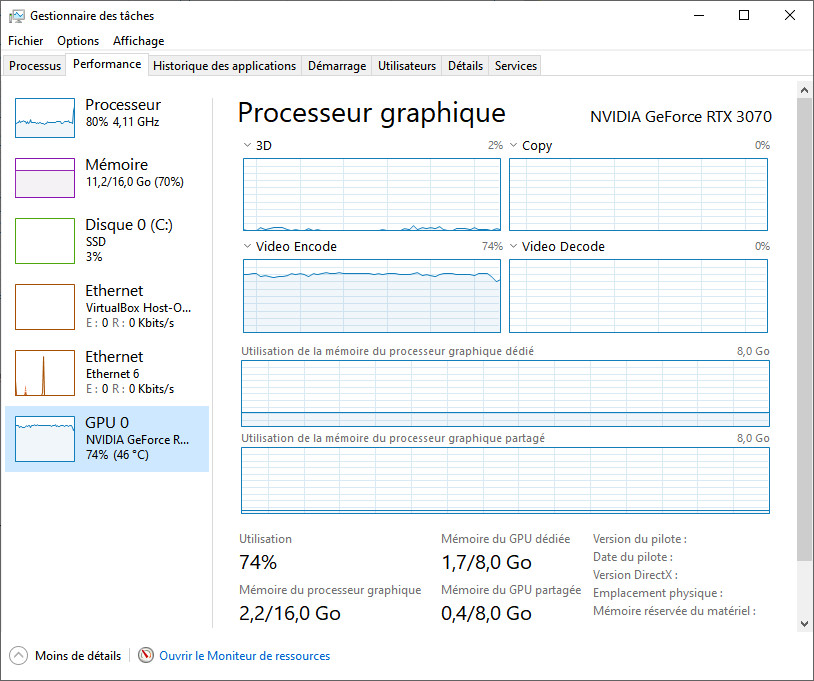
Try to render a project using one of these profiles and take a look at the Performance / GPU / Video Encode section in the Task Manager:
If the GPU Encode graph is low (20% or less) that means that Kdenlive is rendering Effects on the CPU (such as "Position and zoom"). See limitations below.
Limitations
Right now (Apr 2021) effects cannot be rendered by the GPU (at least on Windows). This may lead to frustrating situations where the GPU encoder only works at 20% and render is slow. I used to capture 1080p games in a 1440p desktop, then crop with the "Position and Zoom" effect, I changed that. Now I have set OBS Studio to record in 1080p, negating the need any transformation.
I could not make NVENC work for proxy clips, which is bad.
The Windows version of Kdenlive does not seems to support Movit aka "Experimental GPU processing" which add effects that can be rendered by the GPU. For example, instead of "Position and zoom" you can use "Pan and zoom (GPU)". You should try the Flatpak version (Linux).
I need to backup my NAS to a remote and secure location, and because I am a Azure AZ-103 associate, I have decided to store my data on a Azure storage account. I will use Duplicati, a free backup software written in C# with the following features:
Storage account offers 3 tier storage with different pricing: hot, cool, archive. If you choose a hot tier, access is less charged, but storage is more expensive. This is the opposite for cool and archive, storage is cheap but access is expensive. Archive is the most interesting tier for backups but it has many constraints, such as the need to pick every object inside the container to move them. So I will use cool right now.
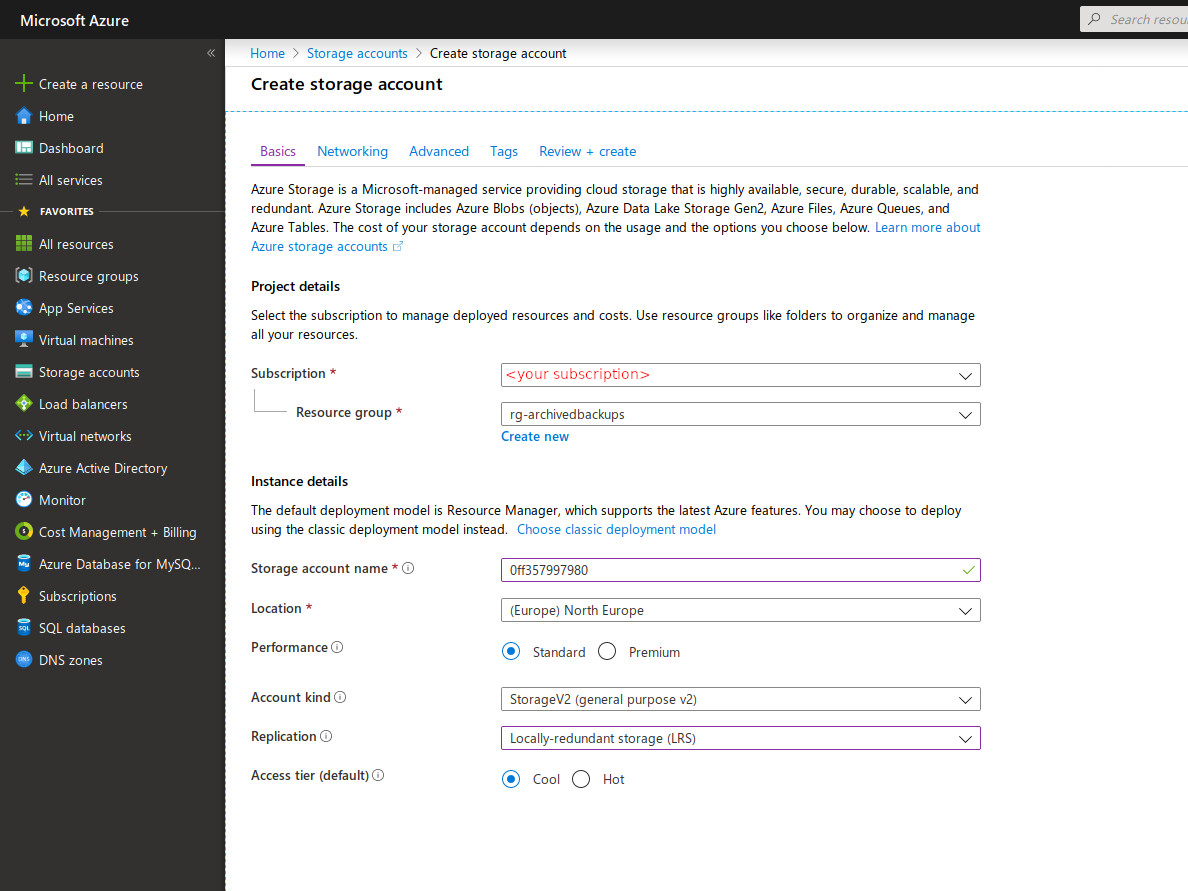
Create a Resource group and a Storage account
First you need to create a Resource group. Go to the Resource groups blade then click +Add. Take a look at Ready: Recommended naming and tagging conventions if you don't know how to name it. Select a region (does not really matters now).
Now you need to create a Storage account. Go to the Storage accounts blade then click +Add.
Subscription: your subscription.
Resource group: the one you just created
Storage account name: must be unique accross Azure and as many limitations, so I recommend using a short name + random id.
Location: Select the location of your choice (choose a close one with an interesting pricing, see Azure Calculator)
Account kind:StorageV2
Replication:LRS
Access tier:cool
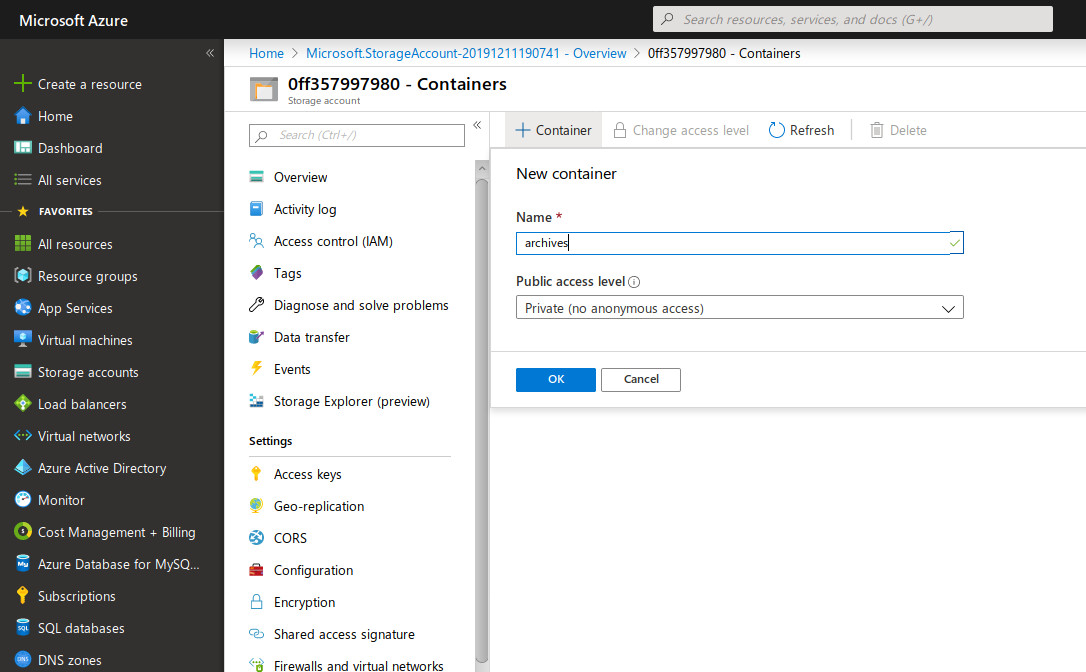
Now open you new Storage account and go to the Containers blade then click +Container. This time the name is private and does not need to be unique. Make sure the Public level access is set to Private (no anonymous access).
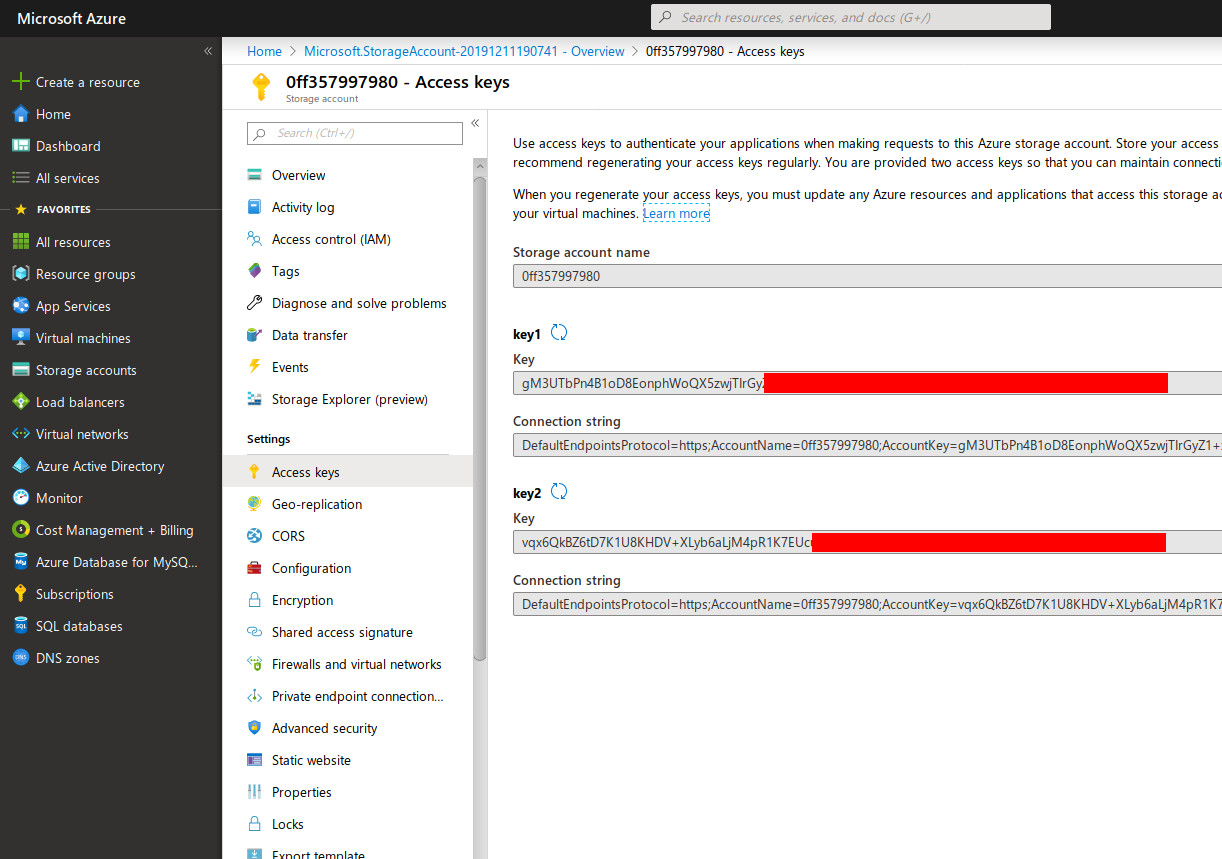
Go to the Access keys blade and retrieve the value of key1 or key2. These key are private and should not be shared with anyone because they basically give full access to the storage account and the data inside.
Configure Duplicati
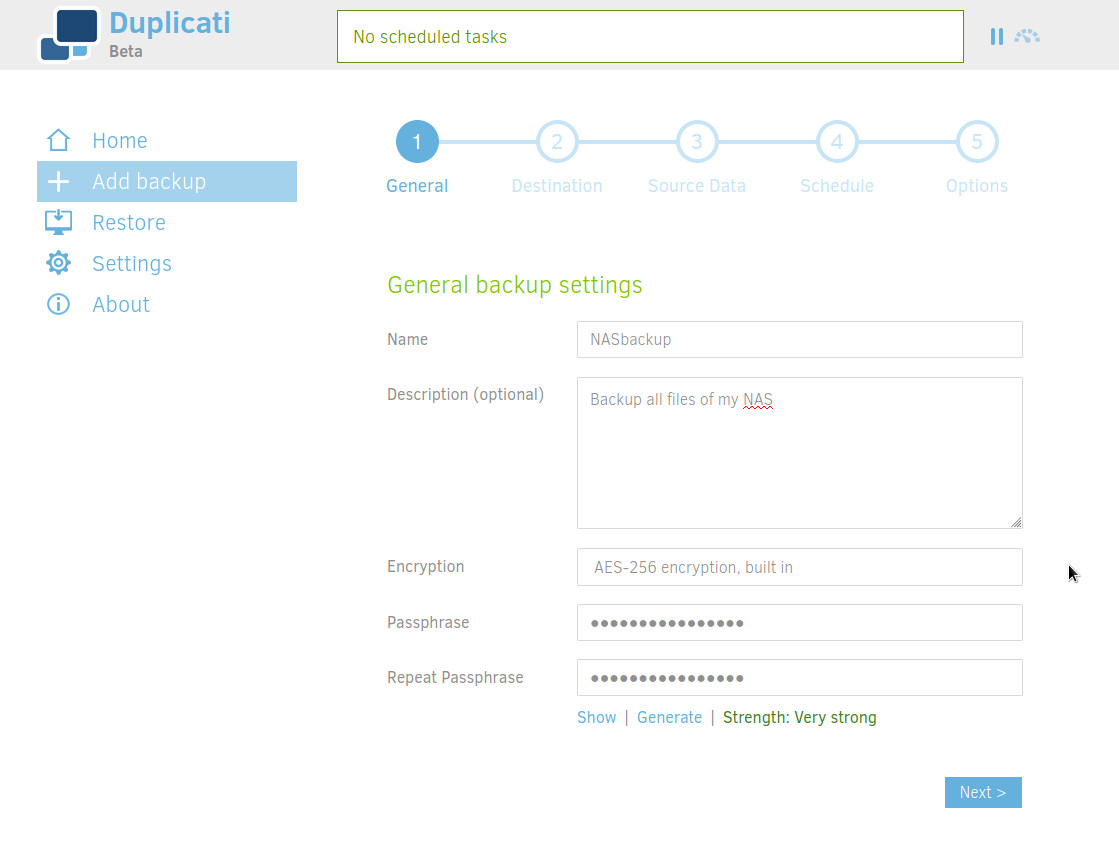
Go into the Web UI then + Add backup > Configure a new backup.
Enter a name, a description and a very strong encryption passphrase. Do not lose it, personally I use Keepass + Syncthing to manage my passwords.
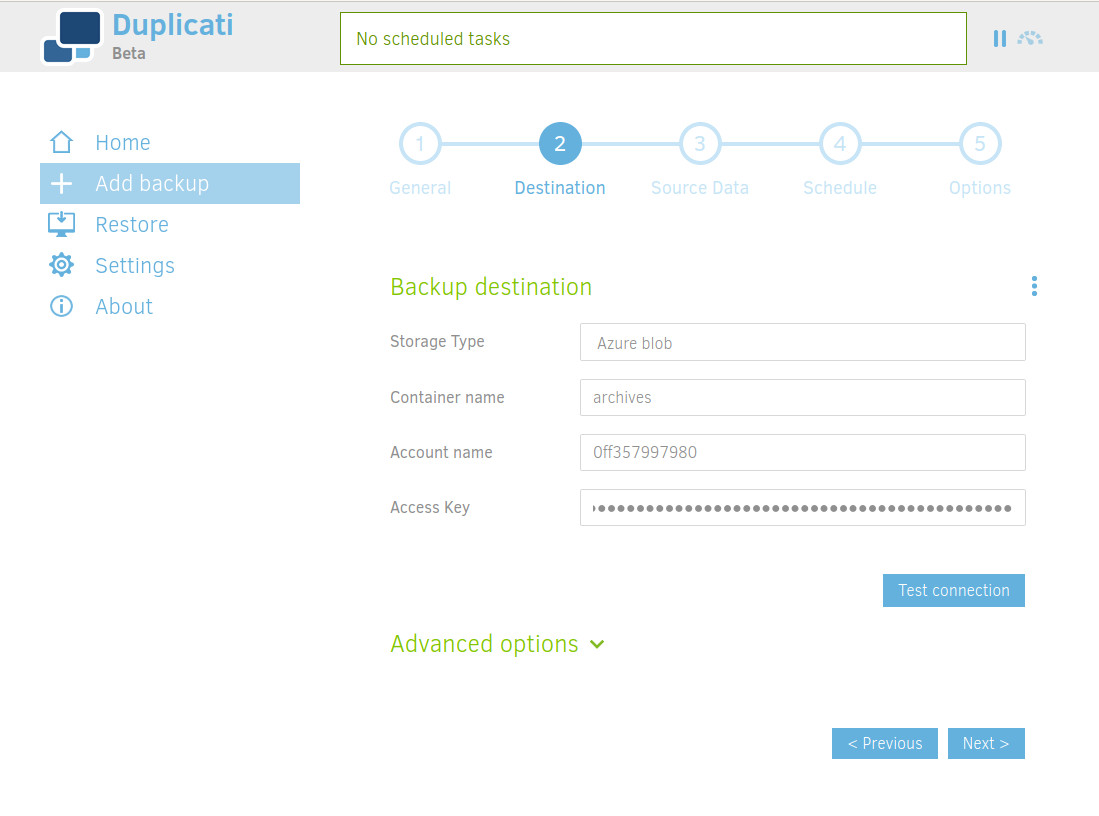
Select "Azure blob" for Storage type and set your credentials.
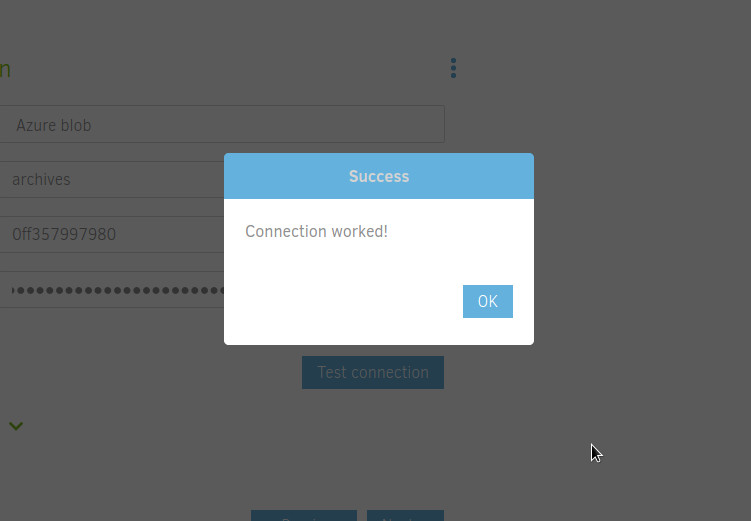
Click Test connection to make sure Duplicati can reach your Azure container.
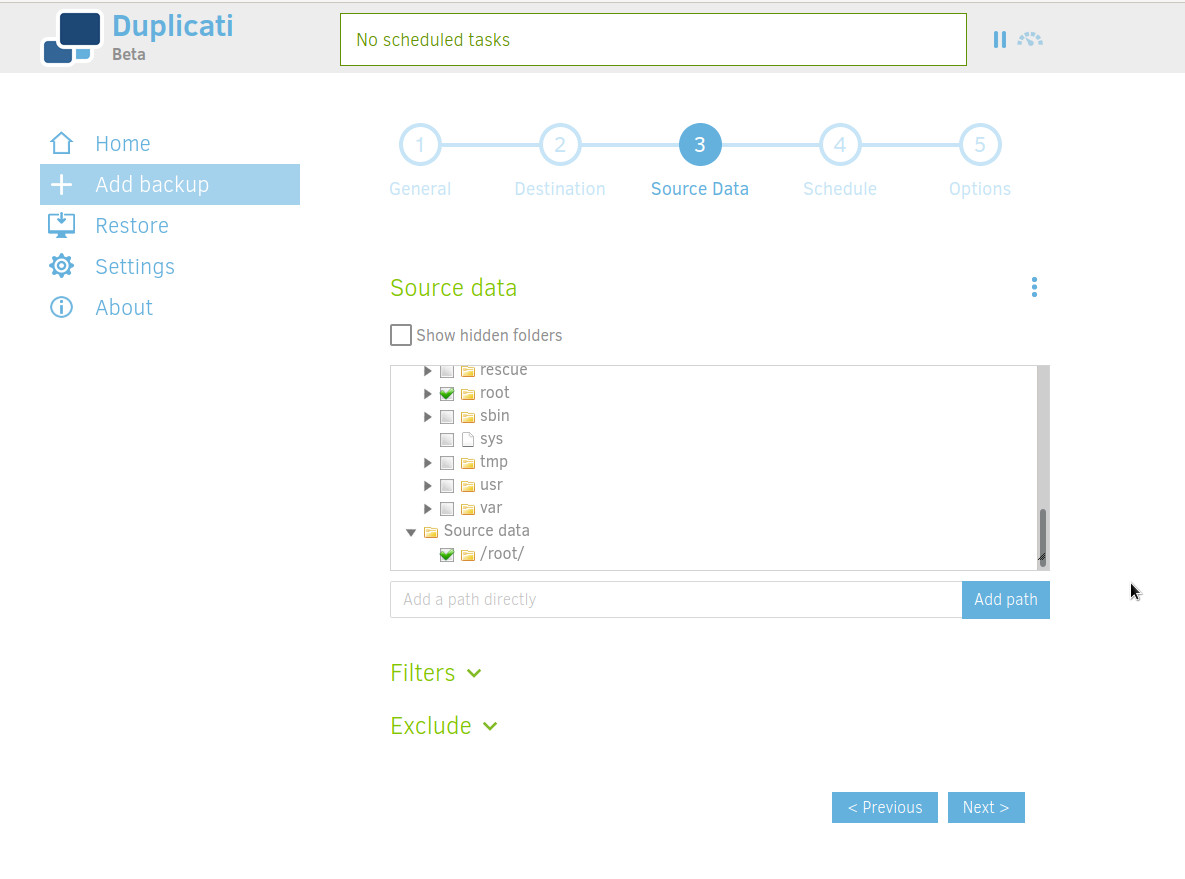
Select the files you want to backup.
Schedule your backup. For me, monthly is enough.
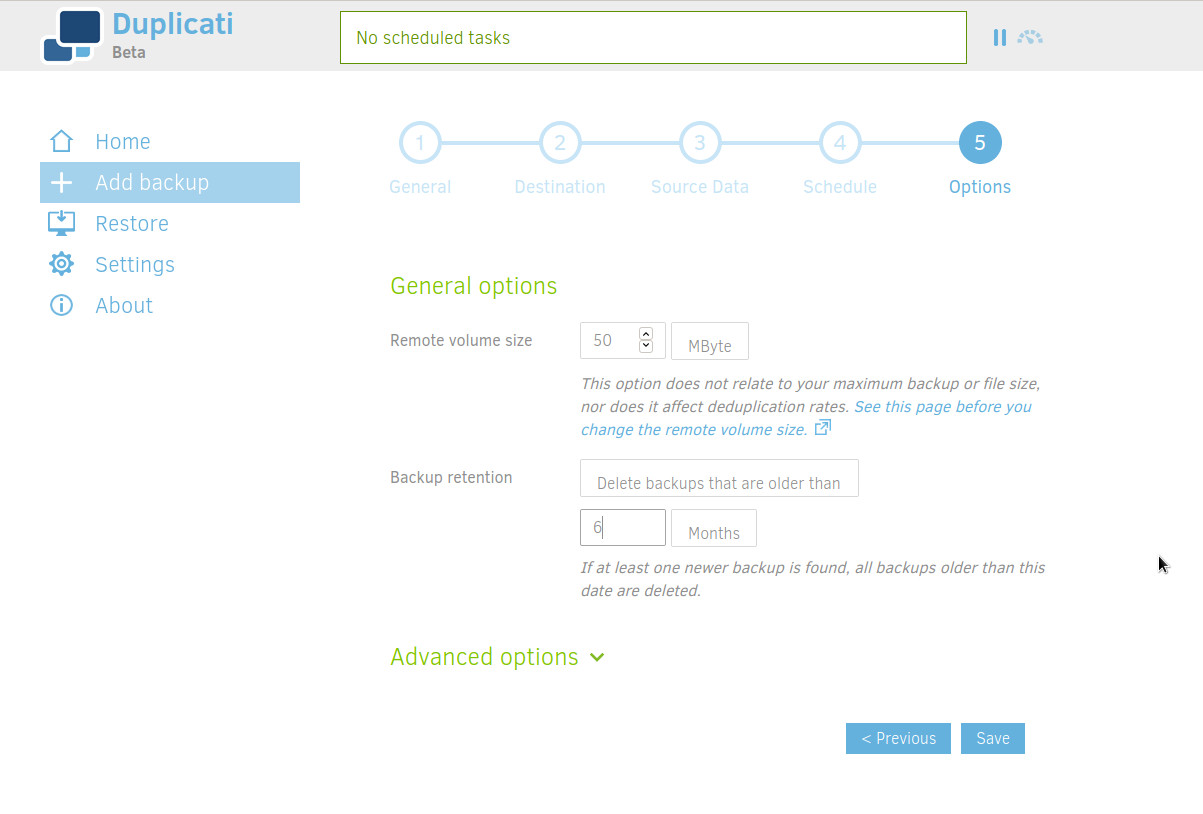
Duplicati will not copy your files one by one but use "volumes". To select the size of each block, read this documentation. Smaller means more transactions but better de duplication. Bigger means less transactions but less optimized de duplication. If you have the bandwith, go for higher chunks. 1 Gbyte seems to be a good value for me. More is not good because it takes too much resources.
You can also set the retention, for me it's 6 months.
Et voila, just run your backup now!
Cost and Metrics
My Storage Account:
Location: North Europe
Performance/Access tier: Standard/Cool
Replication: Locally-redundant storage (LRS)
Account kind: StorageV2 (general purpose v2)
My Backups:
Data source: ~650 GB
Schedule: @Monthly
Volume size: 1 GB
Used capacity (512 GiB) :
Ingress and Egress (Last executions: 2020/10/10 and 2020/10/14):
Transactions (Last executions: 2020/10/10 and 2020/10/14):
I admit I'm not sure sure why I see transactions when there is no backups. I assume it's Azure stuff.
Last invoice:
Monthly billing is always around €5 which is not cheap but affordable. If you need more than 1TB of storage, it might be a good idea to take a look at Google One (Drive) or Dropbox.